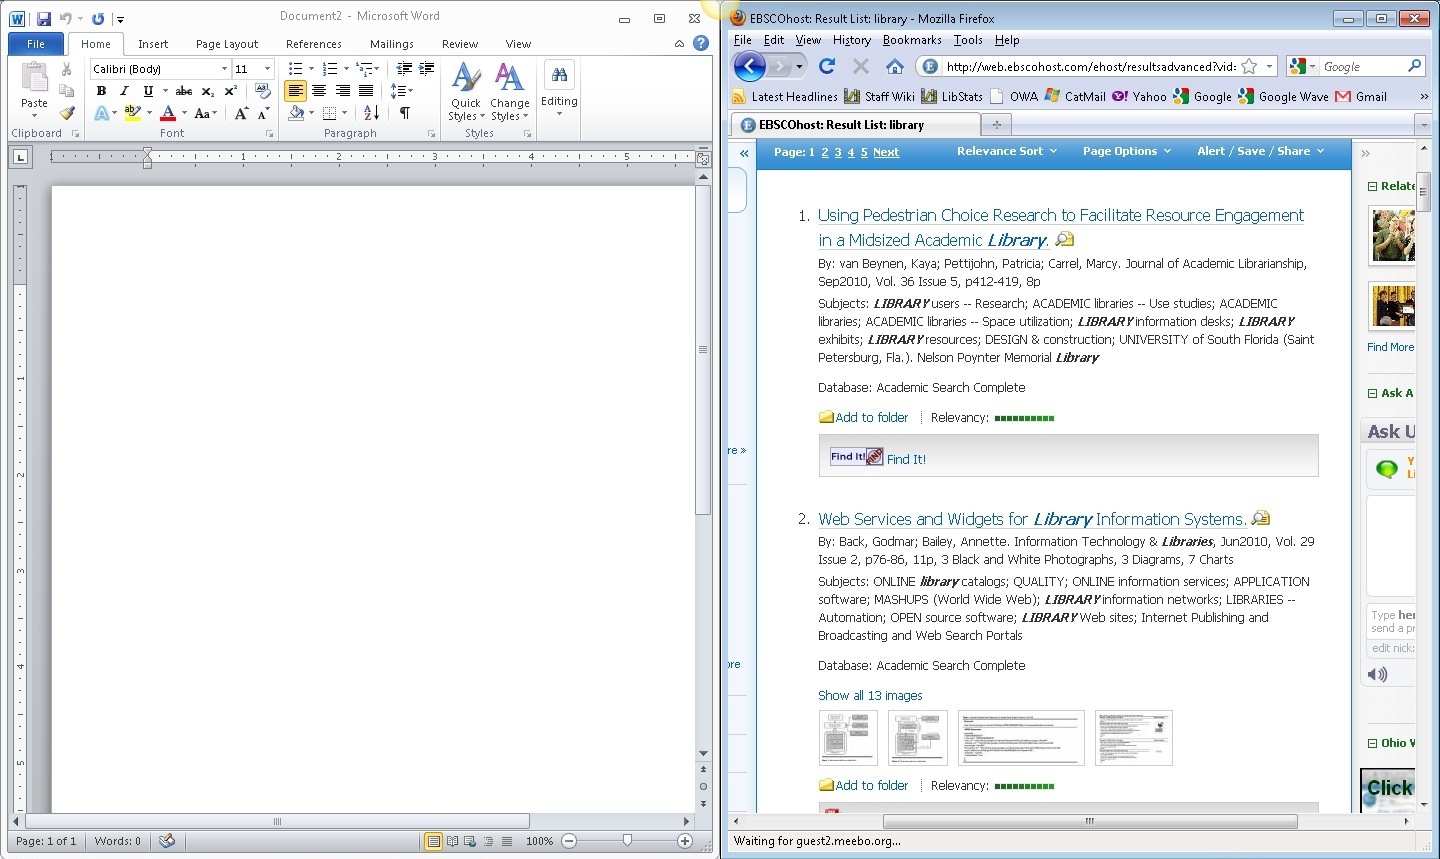
Windows 7 gives us the ability to “lock” windows into both sides of the screen, which in turn gives one the ability to view and navigate across two windows at once. This is helpful for many reasons, with a library example being research on one side of the screen and writing on the other. The following screen-shot shows one such example of Academic Search Complete and Microsoft Word going at once in split-screen.

There are two ways to achieve a split-screen view. Both are fairly simple. One option is to click the top bar of the window, hold, and drag the window to the desired side. Split-screens can be achieved by doing this with both windows in opposite directions. The other option is to use the Windows key and a direction arrow. For example, if it’s desired for the active window to be on the left side of the screen, one would press and hold the Windows key and then also on the left arrow. The following screen shot shows what a window will look like when one has clicked, held, and started to drag toward a side. Please note that you must drag the window all to the side you desire until is expands the length of the screen vertically.

By clicking, holding and dragging one screen to the left and one screen to the right the split screen is achieved. The next screen shot shows a window just before it's locked in. Notice that it takes up the entire length of the screen vertically.

After locking one screen to the right and one screen to the left, the final product is a locked split screen.
The other way of achieving a split screen is through keyboard commands. The command is very easy to remember. It's "Windows Key" + direction. The Windows Key, which is second from the space bar in both directions should be held down while either left or right is pressed on the keyboard to move the active window onto that side. The result is the same either way.
No comments:
Post a Comment